The Asus Rog Ally comes with preinstalled Windows 11 Home by default, but as a regular PC, it can also run Linux. This guide will describe a method for achieving dual-boot on the internal NVME drive. This guide aims to enable dual-boot functionality between ChimeraOS and the Windows system.
Contents
Preparation
- A USB hub, or a docking station, I personally suggest utilizing a docking station that supports PD charging.
- Two USB drives.
- Wired network (recommended)/Wireless network.
- Wired keyboard and mouse.
- Disable secure boot in BIOS
Installation Images
- The ChimeraOS image can be downloaded from here.
- For the Linux Live CD, it is recommended to use the Ubuntu 23.04 Desktop or other distro with a newer kernel. You can find the ISO file here.
Step 1
Since the ChimeraOS installer does not support dual-boot from the same disk, it needs to be installed on a separate device first and then copied to the internal drive. Once this process is completed, the system can be booted and updated normally.
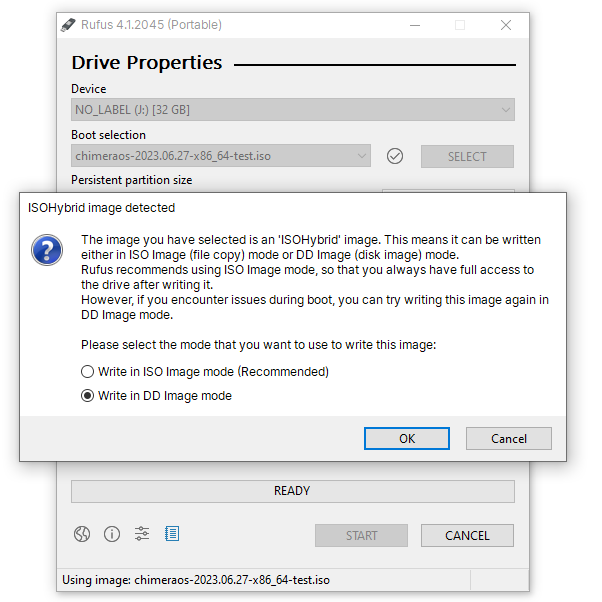
In this step, you will need two drives – one as the installation media and another as the installation target. You can write the installation image using tools like Etcher or Rufus in DD mode.
Connect both the USB drive containing the installation media and the target USB drive to the USB ports on the docking station. Press and hold the volume - button, then press the power button on the Rog Ally to power it on and enter the BIOS settings. In the Boot Menu, select the USB drive where the image is located. Once the image starts booting, you will enter the installation interface. If your docking station has a wired network connection and is recognized by the installation image, it will directly proceed to the installation steps. Otherwise, you need to set up a wireless network to download the system image.
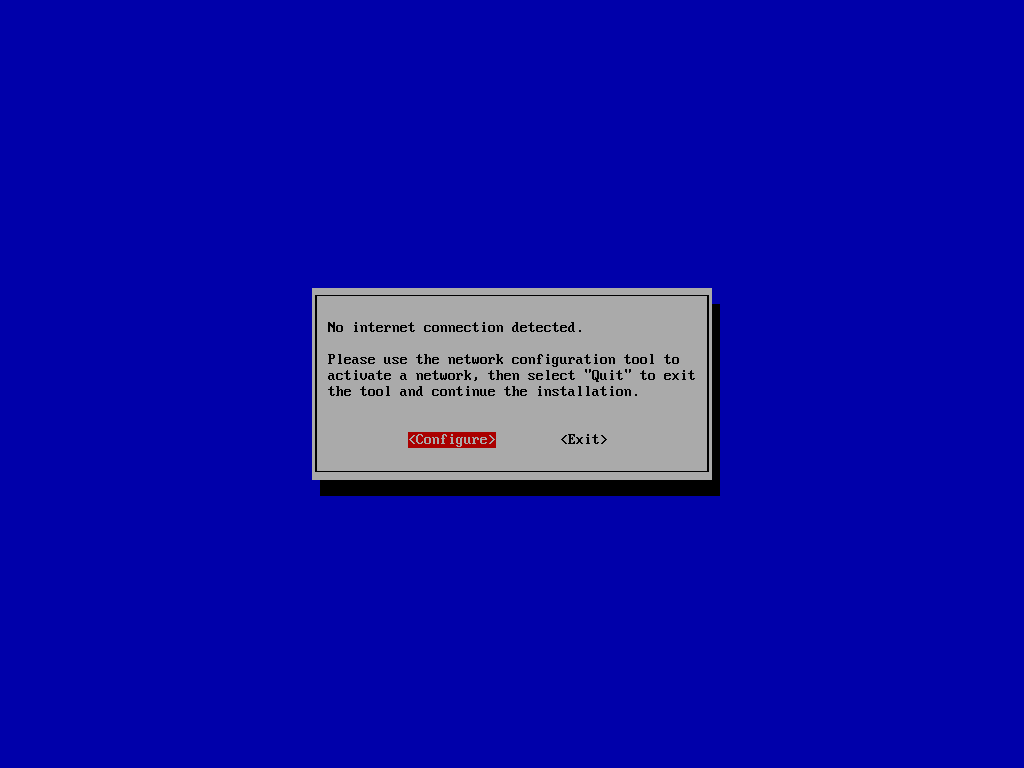
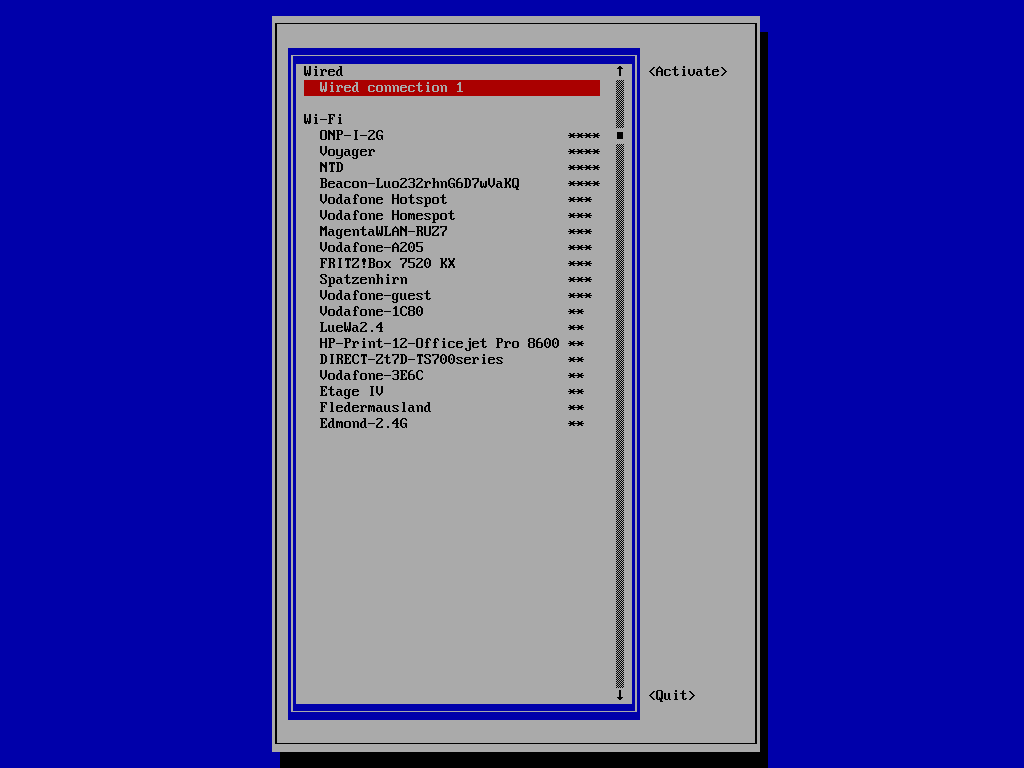
If the network card fails to start properly due to issues with the MT7922e driver, you can try power cycling the device by holding the power button(about 10s) until the battery LED turns off. Then, repeat the steps above to enter the WiFi setup. Once the connection is established, select “Quit” to return to the installation UI.
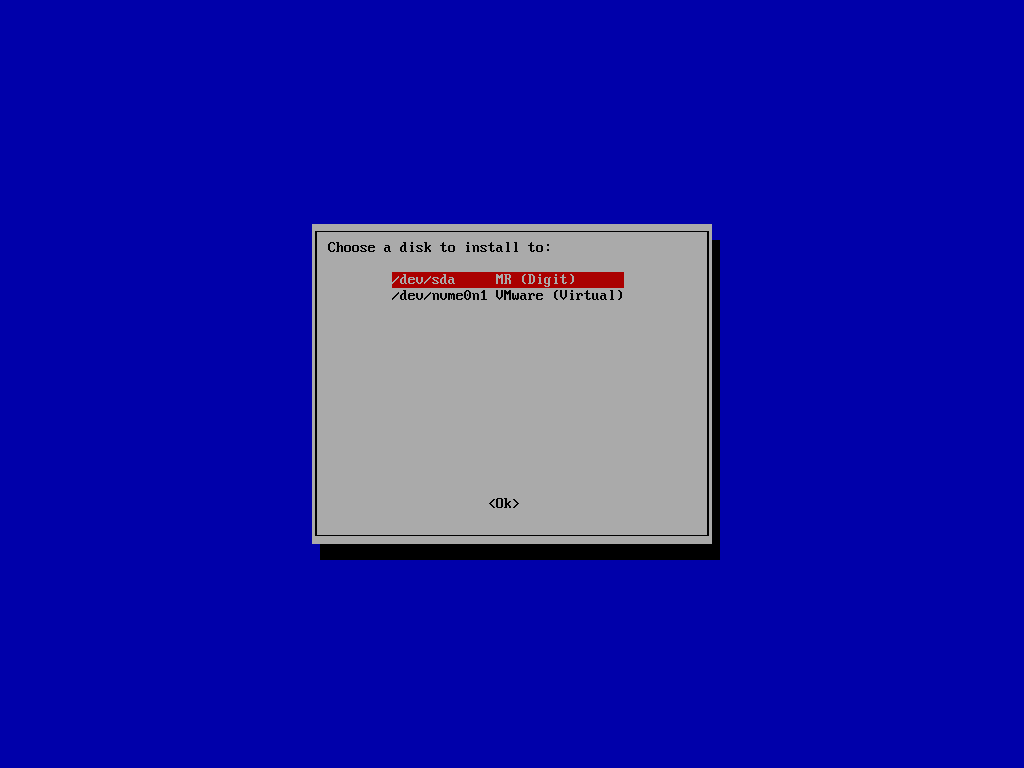
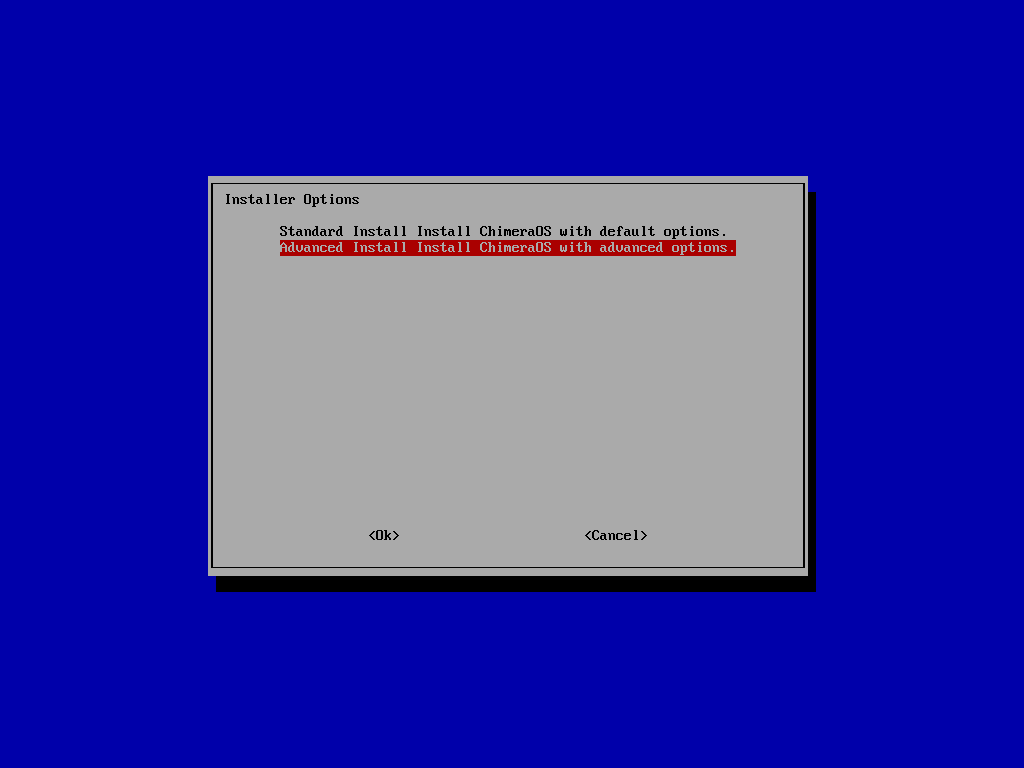
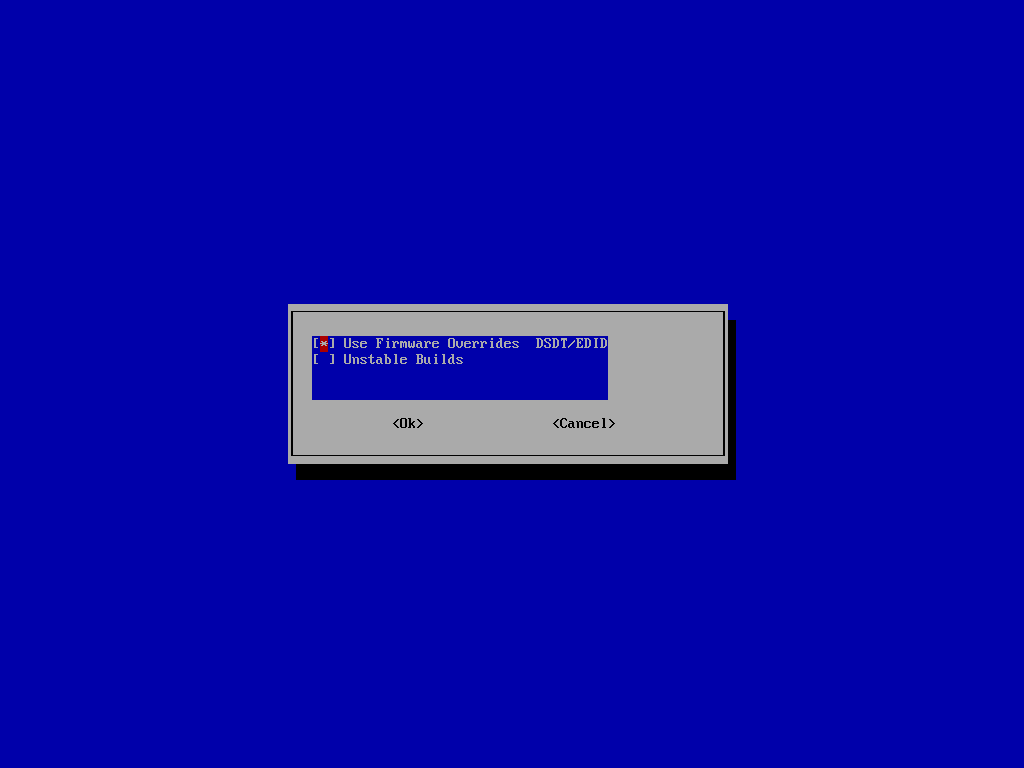
Currently, you need to choose Advanced Install Install ChimeraOS with advanced options. and enable Use Firmware Overrides DSDT/EDID in the menu (use Space to mark the option). Then, wait for the system installation to complete.
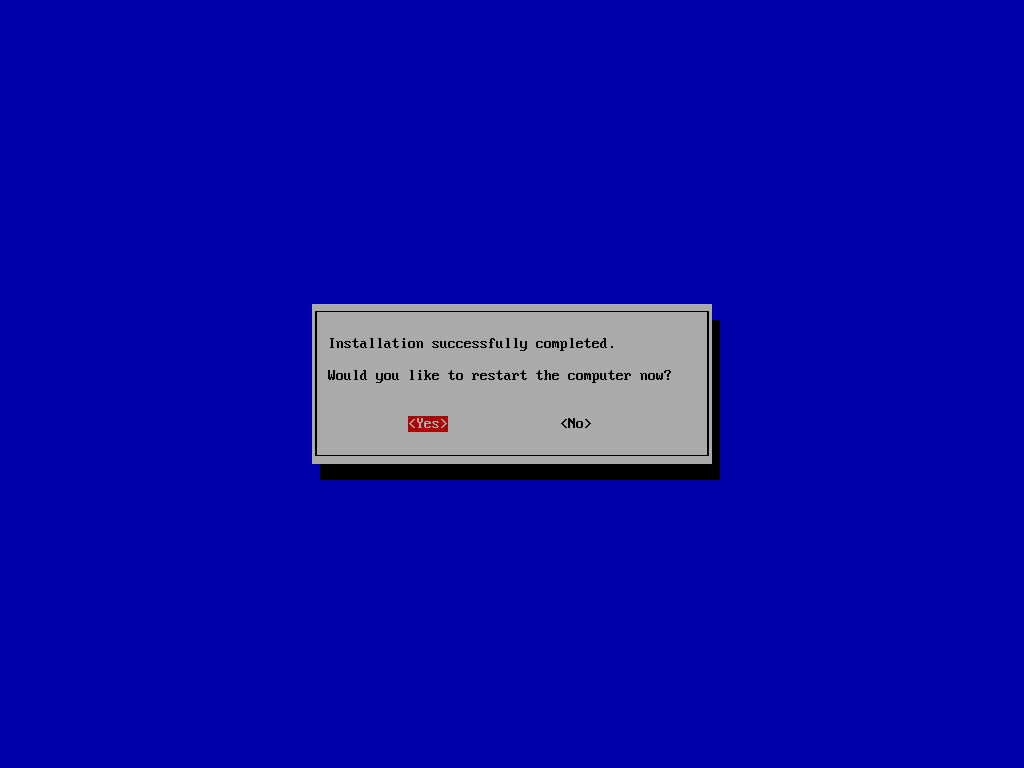
After the installation is finished, you can boot into the system to verify that the installation is successful. Once you have confirmed everything is working properly, you can safely power off the system.
Step 2
In this step, we will need to copy the installed system to the internal NVME drive. This process involves creating a boot partition and a data partition using a Linux Live CD and copying all the files.
First, write a Linux Live CD image to a USB drive using the same method above. Connect this USB drive and the USB drive with ChimeraOS installed to the USB ports on the docking station. Press and hold the volume - button, then press the power button on the Rog Ally to power it on and enter the BIOS settings. In the Boot Menu, select the USB drive where the Live CD is located. Taking Ubuntu 23.04 Desktop as an example, select “Try Ubuntu” to enter the desktop environment. Launch up the terminal.
To begin, let’s view the current partition table to determine the end position of the existing partitions. The “Number” column represents the partition numbers. Assuming the installed Windows has allocated partitions numbered 1 to 5, the new partitions to be created would be the boot partition (number 6) and the data partition (number 7). Please calculate/replace the values based on your actual data.
sudo parted /dev/nvme0n1 unit MB print
The output should be similar as following
Model: Micron_2400_MTFDKBK512QFM (nvme)
Disk /dev/nvme0n1: 512000MB
Sector size (logical/physical): 512B/512B
Partition Table: gpt
Disk Flags:

Number  Start    End       Size     File system  Name                          Flags
 1      1.05MB   106MB     105MB    fat32        EFI system partition          boot, esp
 2      106MB    123MB     16.8MB                Microsoft reserved partition  msftres
 3      123MB    63037MB   62915MB  ntfs         Basic data partition          msftdata
 4      63037MB  63744MB   707MB    ntfs         Basic data partition          hidden, diag
 5      63744MB  64017MB   273MB    fat32        Basic data partition          hidden, diag
Assuming there is available space at the end of your NVME drive’s partition, with the first 64017MB already utilized. We can create a 512MB ESP (EFI System Partition) using the following command and allocate the remaining space as data storage:
Note: Please adjust these value according to your partition table.
sudo parted /dev/nvme0n1 mkpart ESP fat32 64017MB 64529MB name 6 frzr_efi
sudo mkfs.vfat -F 32 /dev/nvme0n1p6
sudo fatlabel /dev/nvme0n1p6 "frzr_efi"
sudo parted /dev/nvme0n1 set 6 boot on
sudo parted /dev/nvme0n1 mkpart primary btrfs 64529MB 100% name 7 frzr_root
sudo mkfs.btrfs /dev/nvme0n1p7
sudo btrfs filesystem label /dev/nvme0n1p7 "frzr_root"
Next, we will create two mount points for the newly created partitions.
sudo mkdir /mnt/{source,target}
Let’s copy the contents of the boot partition.
sudo mount /dev/sda1 /mnt/source
sudo mount /dev/nvme0n1p6 /mnt/target
sudo rsync -avP /mnt/source/* /mnt/target
sudo umount /mnt/source
sudo umount /mnt/target
Next, let’s copy the contents of the data partition:
Mount the data partition.
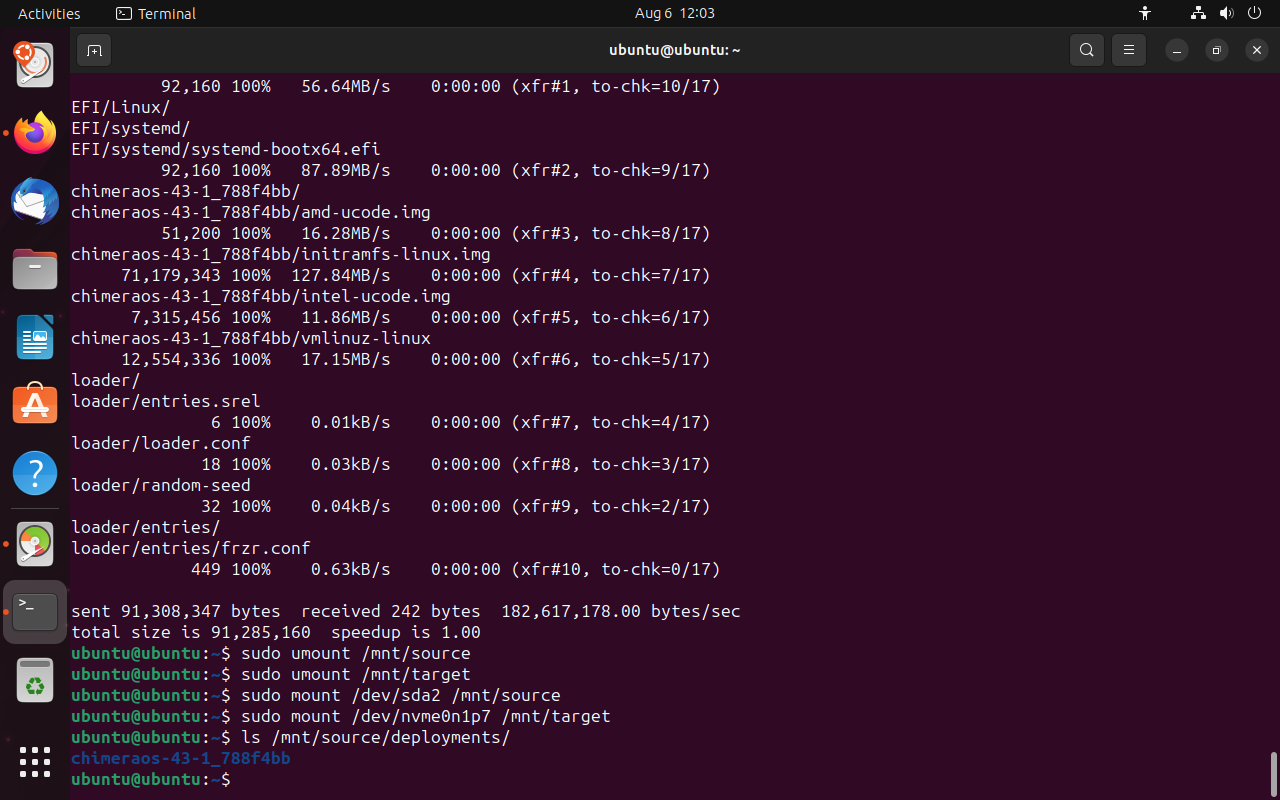
sudo mount /dev/sda2 /mnt/source
sudo mount /dev/nvme0n1p7 /mnt/target
Creating a Btrfs Snapshot for Data Migration. Note: The path of deploy image chimeraos-43-1_788f4bb depend on the current version of the image. You can find it via ls /mnt/source/deployments/.
sudo btrfs subvolume snapshot /mnt/source/var /mnt/source/var.snapshot; \
sudo btrfs subvolume snapshot /mnt/source/home /mnt/source/home.snapshot; \
sudo btrfs subvolume snapshot /mnt/source/deployments/chimeraos-43-1_788f4bb /mnt/source/chimeraos-43-1_788f4bb.snapshot; \
sudo btrfs subvolume snapshot /mnt/source/var/lib/portables /mnt/source/var-portables.snapshot; \
sudo btrfs subvolume snapshot /mnt/source/var/lib/machines /mnt/source/var-machines.snapshot; \
sudo btrfs subvolume snapshot /mnt/source/var/tmp /mnt/source/var-tmp.snapshot

sudo btrfs subvolume snapshot -r /mnt/source/var.snapshot /mnt/source/var.readonly; \
sudo btrfs subvolume snapshot -r /mnt/source/home.snapshot /mnt/source/home.readonly; \
sudo btrfs subvolume snapshot -r /mnt/source/chimeraos-43-1_788f4bb.snapshot /mnt/source/chimeraos-43-1_788f4bb.readonly; \
sudo btrfs subvolume snapshot -r /mnt/source/var-portables.snapshot /mnt/source/var-portables.readonly; \
sudo btrfs subvolume snapshot -r /mnt/source/var-machines.snapshot /mnt/source/var-machines.readonly; \
sudo btrfs subvolume snapshot -r /mnt/source/var-tmp.snapshot /mnt/source/var-tmp.readonly
Data Migration.
sudo btrfs send /mnt/source/var.readonly | sudo btrfs receive /mnt/target/; \
sudo btrfs send /mnt/source/home.readonly | sudo btrfs receive /mnt/target/; \
sudo btrfs send /mnt/source/chimeraos-43-1_788f4bb.readonly | sudo btrfs receive /mnt/target/; \
sudo btrfs send /mnt/source/var-portables.readonly | sudo btrfs receive /mnt/target/; \
sudo btrfs send /mnt/source/var-machines.readonly | sudo btrfs receive /mnt/target/; \
sudo btrfs send /mnt/source/var-tmp.readonly | sudo btrfs receive /mnt/target/

sudo mkdir /mnt/target/deployments; \
sudo btrfs subvolume snapshot /mnt/target/var.readonly /mnt/target/var; \
sudo btrfs subvolume snapshot /mnt/target/home.readonly /mnt/target/home; \
sudo btrfs subvolume snapshot -r /mnt/target/chimeraos-43-1_788f4bb.readonly /mnt/target/deployments/chimeraos-43-1_788f4bb; \
sudo btrfs subvolume snapshot /mnt/target/var-portables.readonly /mnt/target/var/lib/portables; \
sudo btrfs subvolume snapshot /mnt/target/var-machines.readonly /mnt/target/var/lib/machines; \
sudo btrfs subvolume snapshot /mnt/target/var-tmp.readonly /mnt/target/var/tmp

sudo cp -r /mnt/source/{boot,etc,.etc,source} /mnt/target
Remove Snapshots.
sudo btrfs subvolume delete /mnt/target/var.readonly; \
sudo btrfs subvolume delete /mnt/target/home.readonly; \
sudo btrfs subvolume delete /mnt/target/chimeraos-43-1_788f4bb.readonly; \
sudo btrfs subvolume delete /mnt/target/var-portables.readonly; \
sudo btrfs subvolume delete /mnt/target/var-machines.readonly; \
sudo btrfs subvolume delete /mnt/target/var-tmp.readonly

sudo btrfs subvolume delete /mnt/source/var.readonly; \
sudo btrfs subvolume delete /mnt/source/home.readonly; \
sudo btrfs subvolume delete /mnt/source/chimeraos-43-1_788f4bb.readonly; \
sudo btrfs subvolume delete /mnt/source/var-portables.readonly; \
sudo btrfs subvolume delete /mnt/source/var-machines.readonly; \
sudo btrfs subvolume delete /mnt/source/var-tmp.readonly
Unmount data partition.
sudo umount /mnt/source
sudo umount /mnt/target
Create a new efiboot entry
sudo efibootmgr -c -d /dev/nvme0n1 -p 6 -L "ChimeraOS" -l "/EFI/systemd/systemd-bootx64.efi"
Shutting down the Live CD and removing the USB drive, please. Then, press and hold the volume - button together with the power button to turn on the Rog Ally device and access the BIOS settings interface. From the Boot Menu, select Linux. If everything goes as expected, you will now enter ChimeraOS.
With these steps, dual booting using the built-in NVME drive has been successfully achieved.
Step 3
This step will involve using rEFInd as a replacement for the ChimeraOS bootloader, allowing you to choose the system to boot in rEFInd. Currently, the BIOS of the Rog Ally device does not support Gamepad control in the rEFInd interface(Unless you boot into the BIOS settings, the initialization of these devices and their mapping to the keyboard will not occur). However, if future updates enable functionality similar to the Steamdeck, then you will be able to navigate and select the desired system to boot without the a keyboard and mouse in the rEFInd.
Install rEFInd.
sudo frzr-unlock
sudo pacman -S refind
sudo refind-install
Once you restart the system, you can find the rEFInd boot entry in the BIOS settings. Set it as the preferred boot option. From then on, you will be able to switch between the desired operating systems without relying on BIOS settings.
Summary
The tutorial provides a method of achieving dual booting with Windows and ChimeraOS on the built-in NVME drive. rEFInd can enhance the dual-booting experience by providing a superior booting interface.
ChimeraOS utilizes the frzr bootloader and relies on Labels to identify system partitions. Therefore, the system partition, which is on the btrfs file system, must be labeled as frzr_root, while the boot partition should have the label frzr_efi. The dual boot configuration will function properly as long as there are no other partitions with the same labels on the disk.
Note: Once ChimeraOS officially releases a version that supports Rog Ally, I will revise this tutorial and include some screenshots accordingly.
10 Comments. Leave new
I’m unable to mount the data partition. It just says ntfs signature is missing then fails to mount.
Any chance you could add the installation images to your guide?
run
sudo parted /dev/nvme0n1 printto watch the partion table on your device before you mount the data partition. The partition number depands on your OS configuration. You can also post the result here. I will post some images later.I got it working but having some unallocated space and I was able to make partition 7. However after doing everything, there’s no new boot option (after USB devices are removed).
It’s proving difficult as I’ve never used linux so I think I may have to start everything again! Hopefully it goes okay this time.
I’ve updated some of the screenshots and the installation instructions. I hope that helps.
Thanks for the update. I wish more people knew about it (I often see people asking about dual boot).
Also a question, does this only give the frzr_root partition 10GB? Bases on the values you used in the tutorial.
No, the demo means that about 10GB of space was used before, and the remaining up to 100% of the space was allocated to frzr_root. I’ll give a new example later, I hope it looks less confusing
This means … ChimeraOS update routine with “frzr” work and dont brake the dualboot function?
Indeed, as you have rightly understood, ChimeraOS performs system updates solely by updating the images within frzr, without affecting the dual-boot configuration.
Why do you need to snapshot /var/lib/portables and other directories separately after making a snapshot of /var?
When listing the mount points of the btrfs partitions(
sudo btrfs subvolume list /mnt/source), you will observe that they are distinct subvolumes.